Showing posts with label Media. Show all posts

23 June 2014

Sweet Potato {Pound} Cake


This autumn I have fallen in love with the colour plum. A slightly purplish colour, rich, yet soft and warm. As my eye was 'programmed' to recognise every plum item I could find in store, I walked through the vegetable isles and there it was, the sweet potato, also known as the ipomoea batatas

Fresh, slightly purplish in colour and all I could think of, well, SO many recipes running through my head including this beautiful, earthy, plum skinned vegetable. As the sweet potato also needs warmer days and nights for optimum growth, I need something warm and sweet throughout winter to keep me going!
 
I recently made a Sweet Potato Butter Chicken soup and thought that this time I would like to incorporate sweet potato in something sweet. So, I decided to make a Sweet Potato Pound Cake!
{Ingredients}
1 cup Stork Bake, softened
2 cups light brown sugar
2 cups skinned, cooked and mashed sweet potatoes
1 tsp vanilla essence
4 eggs

Then in a separate bowl, sift:
3 cups cake flour
2 tsps baking powder
1 tsp ground cinnamon
2 pinches ground nutmeg
1/4 tsp salt
{Method}
Pre-heat oven 180*C. Grease a 10 inch tube pan with Stork Bake.
Cream Stork Bake and sugar until light and creamy. Add eggs and vanilla and mix well. Add mashed sweet potatoes and mix thoroughly.
In a separate bowl, sift together flour, baking powder, cinnamon, nutmeg and salt. Add to the Stork Bake mixture. Pour batter into the tube pan and bake it for 1 hour at 180*C. Test with a cake tester or toothpick. Let the pound cake cool for 15 minutes in the pan, then invert the cake onto a serving plate/cake stand.

*Serving suggestion: Dust with icing sugar.


{Easy-to-find Pick n Pay Shopping List}


This post was sponsored by:

8 February 2014

I Love {Baking} Pudding & Poetry

Photo: I Love Baking SA - Stork

For my sweet sweet Valentine,
I'd serve a rich Quick Chocolate Fondue
Maybe he'd like some olives in brine,
or a Sweetheart Cookie big enough for two.
 
No need to worry and no need to look,
Stork's Saucy Choc Pecan Pudding is what I'll serve,
and bonus, it's all online in their Facebook recipe book,
a recipe made with love, that's what they deserve!
 
In the KoekiesEnCream kitchen I'll bake and play,
until I have a delicious Saucy Choc Pecan Pudding,
Perfect for Valentine's Day!

If you also want to try out the Saucy Choc Pecan Pudding recipe click here!
 

26 September 2013

{Indian} Chicken Curry

I am very use to cooking chicken in my set ways with, I must admit, very bland flavours. Last night I tried out something new! A lovely - and I must admit I think it's now one of my new favourite flavours - Indian Korma Curry! I made it in a 'potjie' style way by adding the vegetables into the large saucepan on top of the flavoured chicken, to flavour the vegetables as well. Ginger, curry, BBQ and garlic were some of the delicious flavours and boy-o-boy did my husband love it - all his favourite flavours in one pot - and the spices are perfectly mild and not too hot! I think he enjoyed it so much he didn't even notice how much vegetables he actually ate!
 
 
 Find the Easy-to-find Pick n Pay Shopping List below!
 
{Ingredients}
 
12 pieces of chicken - I used a mixture of drumsticks, breasts and wings
750ml boiled water
415g Denny Indian Korma Curry Sauce
1/2 tsp. garlic salt
1 tsp. BBQ spice
salt & pepper to taste
450g mixed vegetables
 
{Method}
 
Season the chicken pieces with garlic salt and BBQ spice. In a large saucepan place the seasoned pieces and water - try not to rinse the seasoning off of the chicken while pouring in the water. With the lid on, let the chicken simmer on high for 25 - 30 minutes or until chicken is cooked through.
 
Add the Indian Korma curry sauce and mix through while on the stove. Turn down the heat to medium and add the mixed vegetables on top of the mixture, salt and pepper to taste. Place the lid back on and let the vegetables steam until medium soft. Do not let the vegetables steam until it is too soft then the curry will have a 'mooshy' texture.
 
Finally turn down the heat to low and gently stir the vegetables into the chicken curry. Let the curry simmer with the lid on for 6-8 minutes and serve hot.


*If you like chicken with a slightly more brown colour, simply pour the chicken curry into a casserole and place it under the grill at 200*C until desired colour is reached.
 
*Serving suggestion: The curry sauce also serves as a lovely sauce when served with traditional Indian lentil crackers - also called Pappadums - drizzled with balsamic glaze.


 {Easy-to-find Pick n Pay Shopping List}
 
 
 This post is sponsored by


23 September 2013

Pick{led} of the Week

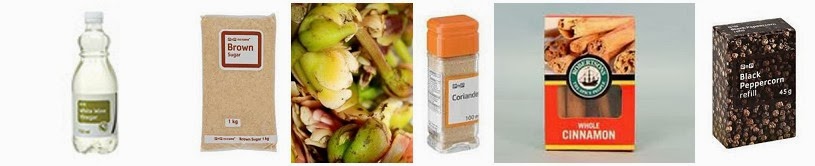
Waterblommetjies! For those of you who don't live in the Western Cape won't be as familiar with this beautiful water flower as we are. They taste absolutely divine in a stew/bredie. Today, however, I tried one of Fresh Living Magazine's recipes - Pickled Waterblommetjies {September 2013 issue - p.28} (Available at Pick n Pay). I made my own little adjustments here and there to fit the ingredients that I have in my kitchen and to make it according to the spice blend I know my taste buds enjoy.
 
Although the pickled mixture has to mature for 3 weeks before one can really enjoy the fullness and deliciousness of the waterblommetjies, I decided to make it now and in 3 weeks time, with Spring then in full swing, I will serve my lovely Pickled Waterblommetjies with a cheese and biltong platter and wine! Find the Easy-to-find Pick n Pay Shopping List below!
 
A perfect homemade gift or to take with to a braai / wine & dine with friends!
 
 
{Ingredients}
 
600g waterblommetjies
2 1/4 cups white wine vinegar
1 1/2 cups light brown sugar
1 tsp. black peppercorns
1 tsp. coriander
3 cinnamon sticks
*Optional: you can also add one chopped red onion for extra taste and colour!
 
 
{Method}
 
In a saucepan, heat up the vinegar and sugar. Add waterblommetjies and spices. With the lid of the saucepan on, bring the vinegar to boil.
 
Pour the mixture into a large glass container (with a lid) and let it cool before closing the glass jar. Now let the mixture mature for 2-3 weeks in the cupboard before serving.  
 

 {Easy-to-find Pick n Pay Shopping List}
 
 
This post is sponsored by
 

23 August 2013

Pretty Pink Pop{corn}

It's Friday!! Which means DVD's, friends, family, eats and lots of weekend treats! This is, I think, one of the quickest treats that you will ever make. That's if you have a microwave (or a stove if you prefer stove popcorn), but remember, I'm trying to make it even quicker!
 
This is a perfect girly birthday party nibble, kitchen tea treat, DVD night sweet snack or makes for a very pretty popcorn cake pop - just add a pop stick. Or you can even package it and make a homemade edible gift. So, let the sticky-fun start! This recipe makes about 14-16 medium sized Pretty Pink Pop{corn} pops/balls. - also, I just had to share the very pretty plum tree blossoms outside my kitchen!


This is what you need:
 
{Ingredients}
 
45 Pink/White Marshmallows
120g Stork Bake
1 packet Ster Kinekor unflavoured popcorn.
Mixing bowl
Microwave - or you can replace it by making your own popcorn, about 5 cups popped popcorn
Saucepan
 
{Method}
 
Grease the mixing bowl and set aside. Pop the Ster Kinekor unflavoured {light} popcorn, available at Pick n Pay, in the microwave as indicated on the package and according to your microwave strength. Put at least 4-5 cups of popped popcorn into the greased mixing bowl.
 
In the saucepan, melt the Stork Bake over medium heat. Add marshmallow and stir until completely melted. Pour the melted marshmallow mixture over the popcorn and mix through. Make sure that each piece popcorn at least has a little bit of the marshmallow mixture touching it.
 
Now its time to get your hands dirty. Grease the insides of your hands with a little bit of Stork Bake, just to keep the sticky mixture from sticking to your hands. Now start making small-medium sized popcorn pops/balls with your hands.
 
Lightly grease a plate and place the already rolled popcorn balls on the plate and refrigerate until cool. Remember, the mixture will not go hard - it's not caramel - it will simply cool and keep the ball in its shape. Store in a airtight container in the refrigerator.
 
Yummy!


{Easy-to-find Pick n Pay Shopping List}
This post is sponsored by
 

21 August 2013

Pine{Apple} Crumble

Apple Crumble is most definitely one of my father's favourite desserts and tea-time treats of all time! This dessert is not only a very comforting dessert because of the lovely Cinnamon smell that fills up the kitchen once you open the oven door, it is also one of the most versatile ones.
 
Whether you like peaches, pineapples, apples or pears, you can probably 'crumble' any fruit that you would like to. Yesterday, I walked into Pick n Pay only to find the freshest Granny Smith green apples that I have had in years. On my way through the fresh fruit and vegetable section I picked up a lovely yellow pineapple as well. Although I didn't mean for it to become a dessert, I came home and thought that while I do love sweet, sour and a little bit of spice together, I'd like to try these two together, in a crumble - pineapple and apples. Today I'm making Pine{Apple} Crumble!
 
{See Easy-to-find Pick n Pay Shopping List below}
This dessert serves 4-6 people.
 
 
This is what I did:
 
{Ingredients}
 
Fruit layer:
 
4 medium sized Granny Smith apples, sliced
Half a pineapple chopped into squares/slices
45 ml traditional golden syrup
40ml caramel sugar


Crumble:
 
1 cup cake flour
1 tsp baking powder
1 heaped tsp ground cinnamon
5 tbsp castor sugar
80g Stork Bake + 1 tsp to butter/grease pie dish
2 tbsp chopped cashew nuts


{Method}
 
Butter/grease a medium sized pie dish with Stork Bake. Place the sliced apple and pineapple pieces in the pie dish to cover the base of the pie dish. Because of all the lovely crumble that will be on top I decided not to make a crust. Evenly pour the golden syrup and then the caramel sugar over the fruit base.
 
In a food processor mix together the cake flour, baking powder, cinnamon, sugar, cashew nuts and Stork Bake until a crumb-like texture forms. Cover the fruit base with the crumb mixture.
 
Bake at a 190*C for 40-45 minutes until the crumbs are light brown and the caramel syrup is bubbling on the sides of the pie dish.
 
*Serving suggestion: Preferably serve warm with custard, whipped cream or ice cream. My dad loves his Crumble and Custard mix! 


{Easy-to-find Pick n Pay Shopping List}
 
 
This post is sponsored by